Painting exterior walls is basically the same as painting any other surface; the major differences are in the scale. As with all painting, the quality and integrity of the finish depends to a large extent on the preparation of the surface before you even open a tin of paint. Also, the preparation differs slightly according to the finish over which you will be painting.

New brick
Concrete and cement rendering should be treated in the same way as new brick. To start with, remove any dust or loose material using a stiff brush, and scrape off any splashes of cement or concrete. Look out for any patches of white fluffy crystals; these are a result of efflorescence, and indicate that moisture is coming to the surface of the wall. If you paint over the patches, the moisture will tend to lift the paint off.
Clean the efflorescent debris off the walls with a stiff brush and wait about two weeks to make sure that no more patches emerge. Wash any mould growth or lichens with a proprietary mould inhibitor or bleach. Then scrape off these growths, and apply a further coat of inhibitor or bleach to the bare surface. Finally, make good deep cracks or holes in the surface using appropriate filler.
Where new, shuttered concrete is to be painted, it is important to degrease the surface because it may still have traces of the release oil used on the inside faces of the shuttering.
Previously painted surfaces
It is always advisable to prepare painted surfaces before repainting, and in the case of exterior work, it is essential if the new coatings are to protect the building in the way they are designed to.

Oil painted surfaces: Wash with a strong cleaning agent, and then rinse with clean water. Scrape off any loose or flaking paint, make good any deep cracks and holes, and fill shallow cracks with suitable exterior filler.
Emulsion painted surfaces: Wash with a detergent, and then rinse with clean water – anything stronger will damage the emulsioned surface. Where water penetrates the surface, allow it to dry completely before you start painting. Again, scrape off loose flaking paint and then repair cracks.
Damp surfaces
Walls that display signs of either damp or mould growth must be treated before you can paint them. Where surfaces are prone to damp, such as basement walls or garden walls, you must apply a coat of bituminous emulsion sealer and allow it to dry thoroughly.
Mould-infected surfaces
Mould growths are common on exterior surfaces where moisture is present as a result of the atmosphere, structural faults or defective plumbing. To remove them, first brush a coat of proprietary mould inhibitor on to the infected areas, and then strip all the mould back with a stiff brush and scraper. Do not use a wire brush, however, as any material particles left behind can cause rust stains. Then apply a second coat of mould inhibitor to the surface and allow it to dry. These solutions contain strong fungicides and you must wear rubber gloves and goggles when dealing with them to guard against splashes. This process must be carried out before any sealer is applied to the surface of the wall.
Access for application
In most cases, exterior surfaces are larger and higher than interior surfaces. Consequently, some form of scaffolding may be required, as well as a particular method of working that will result in even coverage after a number of sessions. Do make sure that when erecting scaffolding, that there is adequate space between the tower and the wall to enable you to prepare the surface and apply the paint.

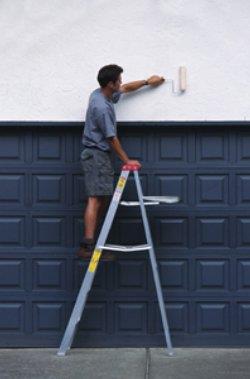
However, unless you have to contend with very large walls, a ladder will usually suffice. When using a ladder, be sure to use a ladder stay – it will make the ladder more stable and make it easier to hang a bucket or roller on the underside with easy access for the brush or roller. Extend the ladder so that you can reach the top of the wall, but remember that it is unsafe to leave less than four rungs above your feet. Position the ladder so that you can reach the extreme right hand side – or left hand side if you are left handed – of the wall.
Assuming you are right-handed, complete the panel to the right of the ladder, then move the ladder to the left and work on the adjacent panel. Continue horizontally across the wall until you reach the left hand side of the wall, and then adjust the ladder to allow access to the area below, and so on. If the light or weather forces you to abandon work before the project is complete, you must try and break off at a point where the joining of the dry and wet film will show least, such as at a pipe running down the wall, a window, moulding or something similar.
Painting
Try to plan exterior painting for warm, dry days. Extreme cold or frost can affect the water content of the paint, causing a complete breakdown in the film. Rain on the surface before the paint is dry can thin it disastrously. The first coat on porous surfaces can be thinned according to the manufacturers instructions. But, be sure not to over-thin; the result will be poor opacity and the need for extra coats.
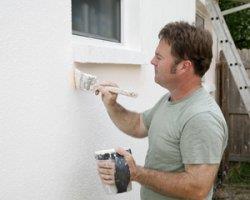
Charge the brush or roller with plenty of paint, and lay it or roll it in all directions. Do not apply the material too far, however, because correct covering and protection requires that it be twice as thick as ordinary liquid paints. Any spots and splashes must be washed off immediately with water because exterior grade paint sets rapidly. During short breaks, wrap the brush or roller tightly in a plastic bag to prevent the air curing the material. Do not be tempted to leave it in water because the initial application will be patchy. When you have completed a session of work, immediately clean all the equipment. – Antonella Dési


