Ongoing advances in technology have transformed the home entertainment industry. Demand is once again growing for a space that provides the best possible home entertainment experience.
 A practical option for homeowners is a multi-purpose media or entertainment room that caters for TV, listening to music, surfing the internet, gaming and reading.
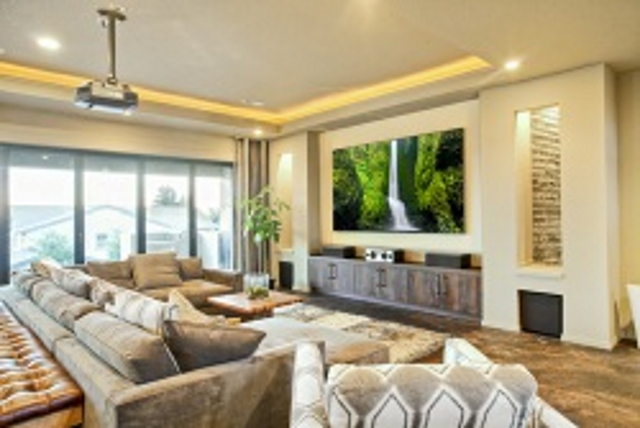
The traditional family room has been replaced with a room where a family can sit and relax to watch home entertainment and enjoy the best possible sound and vision, whether it's a 70cm LED or a 110cm panoramic TV, HD DVD or Bluray, and the latest surround sound system.
If the space is there, all that’s required is careful planning, professional advice and a little imagination.
A practical option for homeowners is a multi-purpose media or entertainment room that caters for TV, listening to music, surfing the internet, gaming and reading. You don't need a large room as a home entertainment space, a smaller room will cost far less to insulate and wire up. And a room with small or few windows is an ideal space to turn into a soundproof space that can be lit to suit the activity.
You would preferably install lighting that can be easily controlled when it comes to a home theatre. Dimmable lights will add ambience and be used to control the amount of lighting if the room is being used for other activities.
Soundproofing
If you already have a room that you want to convert into a home entertainment room, insulation and wiring is the first step. If the room is not located away from bedrooms or you need to reduce noise levels so as not to bother neighbours, be prepared to install acoustic insulation in the walls and ceiling, and under floor if it’s on an upper level.
 The traditional family room has been replaced with a room where a family can sit and relax to watch home entertainment and enjoy the best possible sound and vision.
Using a product such as Isoboard allows you to clad existing walls and ceilings for an R-rated room.
Where you are closing off a large room to make a smaller space to accommodate a home entertainment area, you have wider options for insulating the room, such as using drywall and filling wall cavities with suitable insulation materials.
In a room located on an upper level, adding layers of flooring to deaden sound is achieved with underfelt, thick carpeting and even a few rugs here and there.
Layered window treatments and thick fabrics will absorb sound, further insulating the room and keeping noise level to a minimum.
Upholstered furniture and accessories also add insulating properties, so consider this when dressing and furnishing the room.
Wiring
Setting up a home theatre for the full experience involves lots of wiring, and you will want to do the wiring in conjunction with soundproofing if you are adding partition walls. That way you can hide all the wiring out of sight behind panelling. Allow for additional wiring at the onset if you plan to add new components at a later stage.
 If you already have a room that you want to convert into a home entertainment room, insulation and wiring is the first step.
Technology has advanced to a level where you can plug in or set up wireless speakers for true surround sound and control everything with a single touch via Bluetooth, or from an iPad or android device allowing you to walk into the room and instantly take control.
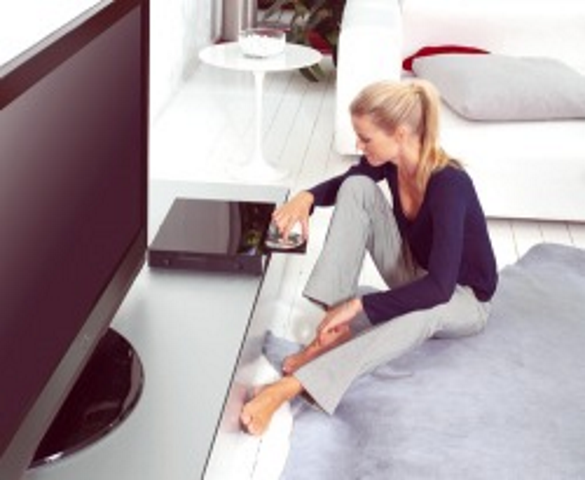
But if you're not up to speed on the latest media devices, you will want to get an expert in to set this up for you. For a more simple room setup, you can consider a home theatre in-a-box solution.
Today’s home theatre can be more than just a room; replicate the cinema experience with comfortable seating, block out curtains or blinds, and even a popcorn machine.
Tips for setting up a home theatre:
Here is advice on setting up a home theatre system from women connected:
- Choose a TV size that is suitable for the room. Every TV has a 'perfect' viewing distance, so be sure to check this out.
- Shop around for seating that allows unrestricted view from all angles.
If you are buying a basic in-the-box home theatre system, apart from the electronic components the kit should include:
 DVD players now have all the necessary connections at the back.
- RCA component cables with red, yellow and white plugs
- Coaxial Cable or antenna or aerial cable
- HDMI (High Definition Multimedia Interface) cable
- Cables for speakers
-Wiring diagram
Place all the components, including the TV, so that you can reach all the connections behind the components before moving them into their permanent position.
DVD players now have all the necessary connections at the back. Speaker outputs should be labelled centre; front right and left; rear right and left; subwoofer, all with the corresponding plugs at the end of each speaker wire labelled or colour coded.
A DVD player also comes with an RCA cable for video. This is the yellow connector and it is plugged into the 'video out' slot at the back of the DVD player, with the other end plugged in to 'video in' on the TV.
The red and white RCA connectors are plugged into the corresponding colour-coded 'audio out' connections. The other end of these cables are plugged into ‘audio in' on the TV.
Bluray players come with an HDMI cable rather than RCA cables and this carries the video and audio signals to your TV. Plug in at the back of the Bluray player into 'HDMI out' and into the TV 'HDMI in'.
A connection for an antenna is also available behind the TV. This is where the aerial or coaxial cable is fitted. If after setting everything up and tuning in you don't get a clear picture, you might need to add a booster to the aerial port to increase signal strength.
Now you are ready to move the components to their permanent positions, making sure to tuck away those unsightly cables.
Good to know:
- If speaker cables do not have plugs, use masking tape to label them according to which speaker it’s attached to. You can always remove the tape when you’re done, although it is better to leave it on.
- Replace the standard cables with higher quality cables. They last longer and in some cases provide better picture and sound quality.
Article courtesy of www.home-dzine.co.za


