Does your bathroom need a fresh new look?
 Most tile paints are available in a limited range of colours, but you should still be able to find a pleasing shade that looks great with your existing fixtures and fittings.
If your bathroom tiles are old, discoloured or just look a bit worse for wear, a brand new coat of paint will do them a world of good.
Repainting your bathroom tiles is a simple DIY job that can be done in a weekend.
If you're tired of your old tiles or you hate their old fashioned colour scheme (bathroom tiles of a certain vintage always seem to be avocado or off-white don't they?), spray painting your tiles is the way to go.
Johan Janse from Cape Town Painter and Decorator shares seven easy steps to help make sure you get a finish you'll love.
1. Decide on a colour scheme
The right colour coordination makes all the difference to the look and feel of a bathroom.
Most tile paints are available in a limited range of colours, but you should still be able to find a pleasing shade that looks great with your existing fixtures and fittings.
2. Fix up the grout
Take a look at the grout between your bathroom tiles. If it's dirty, discoloured or needs to be replaced, do that first.
It's recommended that you fix up your grout a week before you start painting your tiles to make sure that it sets properly. If the grout isn't too bad, you don’t need to replace it – simply give it a thorough scrub and pass a grout pen over it to do the trick.
 If the grout isn't too bad, you don’t need to replace it – simply give it a thorough scrub and pass a grout pen over it to do the trick.
3. Get rid of mould and dirt
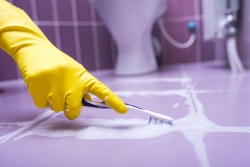
If there’s mould or dirt on or near your tiles, you'll need to get rid of it before you start.
A good clean using a mix of household bleach and hot water is enough for most mild cases of mould and mildew. Alternatively, you can buy a mould spray at your local hardware store for more stubborn marks.
Follow up with a thorough clean using a special tile cleaning product (you can pick these up at your local hardware shop), and make sure the area is completely dry before you start.
4. Sand down the tiles
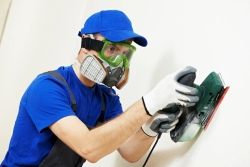
This step is so important. Tile paint won't bond to a glossy surface, and the overall finish will be uneven if you try. That's why you need to sand down every inch of your tiles until the surface loses its gloss.
Remember to kit yourself out with gloves, a mask and safety goggles before you start. An orbital sander will make the job much easier and quicker to complete, but you can also sand by hand. Use a 400-grit sandpaper and keep going until you have an even, gloss-free surface.
 If the grout isn't too bad, you don’t need to replace it – simply give it a thorough scrub and pass a grout pen over it to do the trick.
When you're done cleaning and sanding, be sure to wipe and vacuum up any spills to get your surface as neat as possible.
5. Get ready to paint
Before you start painting, remove as many fixtures (such as taps and drain covers) as you can. Make sure the area around your tub is clear too.
Use masking tape to cover any areas you don't want to get paint on such as the ceiling corners or the floor.
You'll also need a supply of gloves, goggles and masks for yourself. Epoxy resin is unpleasant if you breathe it in, so you might want to consider getting a ventilator to wear.
6. Prepare your paint
The tiles need to be painted with a good quality expoxy resin paint, which will bond properly to the surface and create a hard, ceramic like finish.
The easiest way to get the right paint for your tiles is to buy a special tile painting kit. Your local Builders or hardware store can advise you on the best tile painting kit for you. Brands such as Rust-Oleum sell kits for about R1 000, which is much cheaper than the cost of having your tiles replaced!
 A spray paint applicator is by far the best way to paint your tiles. You'll get a much more even and smooth finish than you would with a roller or paintbrush.
7. Apply your paint
A spray paint applicator is by far the best way to paint your tiles. You'll get a much more even and smooth finish than you would with a roller or paintbrush.
Start at the top corners and work your way in and down. Take it slow – a rush job is more likely to have mistaken or uneven areas.
Check the manufacturer's instructions to see how long you need to leave your newly painted tiles before touching them or exposing them to water.
If you want to add an extra special finishing touch, you can wait till everything is dry and then repaint the grout in a contrasting colour, or add some stencils or transfers to your tiles.
Refinishing your bathroom doesn't have to take a lot of time or money. With the right materials and these seven easy steps, your tiles will look good as new in no time.


