
How many of us have gone off to that audio visual or home theatre store, spent hours examining the surround sound systems, and finally returned home with a lovely, shiny box – only to open it up and realise we have no idea what to do with it. It's a good bet, more than just a few.
 It may sound obvious, but selecting the right position for your TV, couches and speakers is one of the most vital steps for a successful installation.
Installing a pre-packaged surround sound system in an existing room can be a bit of a pain. Very few of us have the luxury of a dedicated room, let alone conveniently-installed conduits to carry all the cables. And let’s face it: the set-up instructions that come with pre-packaged systems can be confusing at best and incomprehensible at worst.
4ward-design, a home automation, audio visual and custom design home theatre specialist, shares the top five tips for installing a surround sound system, DIY-style.
Here’s what they suggest:
Step 1: Location, location, location
It may sound obvious, but selecting the right position for your TV, couches and speakers is one of the most vital steps for a successful installation.
The most obvious layout may not always be the best, and you’ll need to consider not only where your existing power points and TV connections are, but also things like the position of the sun. The last thing you need is to turn on the rugby at 5pm and discover the glare from the afternoon sun makes the game next to invisible.
 Read the instructions from beginning to end as this will save you time at the end of the day.
It’s also worth pointing out that even wireless speaker systems need a power cable for each speaker, so think about how and where you can run those cables without turning your living room into a bird’s nest.
Step 2: Read the instructions
This is everyone’s least favourite step, and often gets ‘forgotten’ in the excitement of unwrapping a new toy. It might not be fun, and you might not understand everything right away, but making the effort to read the instructions from beginning to end can and will save you time at the end of the day.
4ward-design recommends making a list of any extra supplies mentioned in the instructions such as wire cutters, extra speaker cabling, HDMI cables and power adapters – that way you only have to hit the hardware store once.
Step 3: Lay it out
The first thing to position is your LED display panel – your TV. After all, this will be the centre of attention and needs to be angled correctly for maximum viewer comfort.
 It’s also worth pointing out that even wireless speaker systems need a power cable for each speaker, so think about how and where you can run those cables without turning your living room into a bird’s nest.
Height is important, so position the screen so that when you’re sitting down, you’re looking directly at the bottom third of the screen. A lot of standard LED display units are actually too low, and you might want to consider wall-mounting your screen if that’s the case in your home.
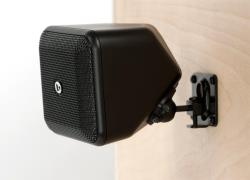
Step 4: Surround that sound
Your speaker positions relate directly to the position of your screen and your seating arrangement. Your centre speaker is always positioned as close to your TV as possible – usually centred right below the screen. This speaker carries the voice channel for whatever you’re watching, and functions as an acoustic extension of the visuals on the screen.
Left and right front speakers should, ideally, be equidistant from either side of your TV. Depending on your room, this might not always be possible and you may have to balance the sound pressure of these speakers using the on-board digital sound processor. The same goes for your left and right rear speakers, which should be behind your seating position.
The height and distance between these speakers is a matter of personal preference, and you can play around to see what works for you. 4ward-design likes the front ‘tight’ at around 2.5m apart, and back ‘loose’ at 3.5m apart and slightly higher than the front. Don’t go too high or too low on either front or back, as you’ll lose the ‘sound stage’ effect.
Step 5: Bring in the base
The last speaker you install is the subwoofer – the thump and rumble. Positioning on this isn’t critical, but should never be inside your TV unit. It needs to sit on the floor, and it needs to “breathe”, so don’t tuck it away in a cupboard.
Once that’s done, all that’s left is to grab the popcorn, sit back, relax and enjoy your new surround sound system.
For more information, visit www.4ward-design.com.


