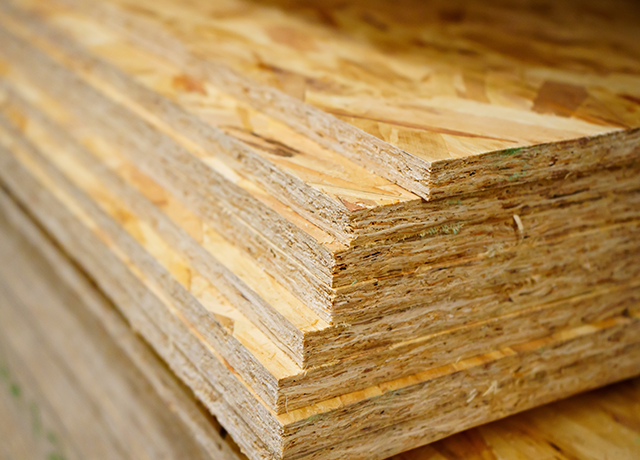
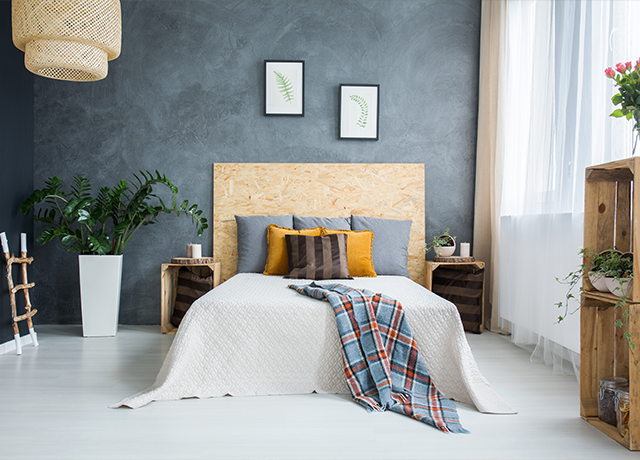
Oriented strand board is one of the toughest and most affordable board products you can purchase. While it is similar to chipboard or particle board, OSB is far stronger and more durable than either and still costs less. The downside to OSB is the raw look that this board has, but sometimes you can use this to your advantage when making furniture for the home.

What is OSB?
Oriented strand board, or OSB as it is more commonly known, is a manufactured board that is formed by compressing layers of paper-thin wood strands and combining this with strong adhesives. The board product closest to this is chipboard or particle board but this board product is manufactured using chips rather than strands. The strength of OSB lies in the overlapping layers of strands that, similar to plywood, are cross-oriented to give this board load-bearing strength when used in construction. However, OSB is considered a more eco-friendly product than plywood as it is manufactured from smaller-diameter trees which means it has less of a negative impact on our environment.

Where can you use OSB?
Know for its structural strength and being a more durable board product than plywood, OSB is predominantly used as cladding on walls and floors, exterior panelling, sub-flooring, and now, in furniture production. The natural appearance of OSB has resulted in OSB being used in home renovation and decoration as well as the construction of furniture. OSB is also suitable for exterior applications for wendy house interior walls or cladding for sheds or storage huts.
OSB furniture
With plywood furniture having its turn in the spotlight, why not give OSB a little bit of attention, especially since it is a much more affordable product and easier to work with? When used in its natural state, OSB only required sanding with fine grit sandpaper (wear a mask when doing this) and looks great as is, or you could apply a couple of coats of satin or gloss sealer to really bring out the beauty of this product.
Not everyone likes to use epoxy resin and it does require some experience using it for perfect projects, but there is another solution for how to achieve a shiny or glossy finish and that is to sand using fine grit sandpaper until you have a super-smooth surface and then apply 2 or more coats of clear polyurethane sealer or varnish.
TheSpruce shares tips on how to paint OSB board:
Before painting, you will need to do several things. Suppose you want to smooth out the texture so that the crosshatched wood chips are not visible. In that case, you can add a polyester resin filler and repeatedly alternate filler coats with sanding to smooth out the board's texture.
Once your board is ready, be generous with the primer. OSB's open strands readily absorb the paint, requiring two or three coats of primer to close up the pores. Older OSB will be incredibly porous, requiring several coats of paint plus primer. Particularly old OSB that is beginning to fall apart cannot be painted; the paint will not help glue the OSB together.
Instructions:
Lightly Sand the Surface
Sand OSB before painting with 80-grit sandpaper fitted on an orbital sander. Lightly sand the surface but do not sand the edges.
Clean the Surface
Thoroughly clean the surface of the OSB. Due to the OSB's rough texture, tack cloth and cotton rags do not work well. Instead, clean the surface with a shop vacuum and brush attachment.
Prime the OSB Multiple Times
Don gloves. Pour primer into a tray. Dab the roller in the primer and thoroughly roll it out on the tray. Prime the OSB by making W-shaped sweeps of the board. Do not apply too thickly. After at least two hours of drying time, apply a second coat of primer. Repeat this process until the OSB's flake pattern no longer shows through.
Apply the Filler (Optional)
If you want to smooth down the surface and edges, apply a resin filler coat with a putty knife. Apply it as thinly as possible. After the resin has dried (about 20 to 30 minutes), sand down the board and the edges with 220-grit sandpaper. You may need to repeat this cycle four or five times before all of the texture has been smoothed over.
Prime the Filler (Optional)
If you applied filler and have gotten it smooth to your satisfaction, you will need to prime it twice.
Paint the OSB
After the last primer coat has dried, apply the paint. As with the primer, do not apply it in thick coats. Instead, apply two to three light coats, letting each coat thoroughly dry before proceeding to the next coat.
Want all the latest property news and curated hot property listings sent directly to your inbox? Register for Property24’s Hot Properties, Lifestyle and Weekly Property Trends newsletters or follow us on Twitter, Instagram or Facebook..


