 The bench is built from special concrete blocks, which can easily be substituted with clay or cement bricks.
1. Lay a concrete slab
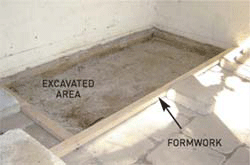
Excavate the area to 100mm deep and to fit the bench, spacing the formwork to fit rows of blocks to avoid cutting. Mix and pour the concrete slab, screeding using a sawing action across the formwork, float to a smooth finish and leave to dry.
 2. Add damp-proof course
Use a combination square and straightedge to mark out the bench. Roll out a layer of aluminium damp-proof course (DPC) where the blocks will lay, creating a slip joint between the blocks and the concrete.
3. Lay the first course
Mix and spread the mortar 10mm thick over the
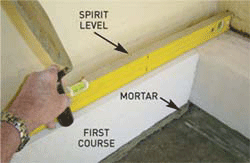 DPC with a trowel. To bed the first course, tap the end blocks into position, apply adhesive to the butting ends of the blocks with a notched trowel, position and check with a spirit level.
 4. Lay remaining courses
Position the second course to overlap the vertical joints with a minimum of 100mm. Apply mortar on the first course and to the blocks, tapping to close the vertical joints to 2mm.
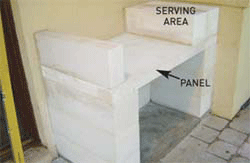 Lay the third course to match the first course.
 5. Bed the burner panel
Check the panel against the third course and adjust to fit. Apply mortar over the third course with a notched trowel, lift and bed the 75mm-thick panel on the mortar, tapping to make it level.
6. Add the side benchtops
 Apply construction adhesive to the panel and along the inside faces of two 600 x 200 x 200mm blocks and secure. Adhere a 100mm-wide block to the other end of the panel.
 7. Attach the door stiles
Cut an 18mm-wide x 5mm-deep rebate on the ends of the door head, glue and screw to the stiles. Drill two clearance holes through each stile, securing the frame to the blocks with 100mm x 14g galvanised bugle-headed batten screws.
 8. Make and hang the doors
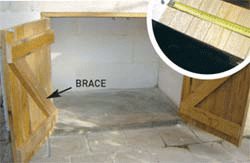
Assemble the doors, cutting the last boards, leaving a 3mm gap either side and 2mm at the centre, apply alcolin wood glue to the edges and clamp. Cut the braces, securing with 30mm x 8g galvanised screws. Align hinges with the brace, securing to doors and stiles. Finish the doors with Woodoc 30 Low Gloss Polywax Exterior Sealer.
9. Apply render and tiles
Finish off the bricks with a layer of Coprox Dualcote for a decorative finish and leave to dry. Tile the top in your choice of tile - we used mosaic tiles to match the decorative mosaic panel that hangs above the braai - including the panel under the barbecue.
Article courtesy of www.home-dzine.co.za . Click here for more home design ideas.
If you have a question or comment for Janice Anderssen, email us here.
Property News
Click here for more property news articles.
Need a blog?
Start your own blog with a free blog from 24.com.

