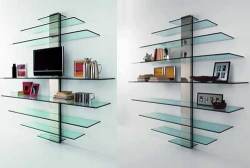
Glass is a versatile material, useful for all sorts of jobs around the house. Apart from traditional applications such as glazing in doors, windows and mirrors, it has a great decorative value when used for shelves, backsplashes, room dividers and ornaments. But to use glass to fill its full potential it is essential to master the techniques needed to cut and shape it.

Types of glass
One of the great advantages of using glass is that there are an infinite variety of types, patterns and colours to choose from, including:
Float glass: Most clear glass used for windows and doors is float glass. This high quality glass is available in a variety of thicknesses. It is vitally important to choose the correct thickness of glass fro your needs – consult a glass supplier to find out which thickness is most suitable to your needs.
Toughened glass: If, during manufacture, glass is heated close to melting point then quickly cooled, it is up to five times stronger than ordinary glass. This type of toughened glass is widely used for glazing patio doors, tabletops and any other areas subject to above-average strain. Available in various thicknesses, depending on the size of the sheet, it does have the disadvantage of being almost impossible to cut or drill, so be sure to order the correct size.

Mirrors: Most modern mirrors are made from 6mm thick high-quality float glass and are virtually distortion free. The glass is then backed with silver, copper or paint to give a reflective finish.
Wired glass: Wired glass is formed by sandwiching a welded wire mesh within the glass during the manufacturing process. This means that the glass is particularly tough and holds together even when cracked or subjected to high temperatures. The principal use of wired glass is in fire-resistant glazing or in roof lights to help prevent accidents.
Diffuse reflection glass: Sometimes it is necessary to use glass with a non-reflective surface, such as when framing pictures, prints or photographs. Diffuse reflection glass provides a solution by subduing reflections while at the same time providing good transparency.
Patterned glass: This is produced in a wide variety of colours and textures and is usually between 3mm and 6mm thick. Though it can be chosen to complement the décor, the greatest advantage of patterned glass is that it offers a degree of privacy without shutting the light out entirely.
Solar control glass: This kind of glass reduces the transmission of heat, light and glare from sunlight. It is available in a range of colours in float or patterned texture finishes.

Ordering glass
When you are ordering glass, always give the height first and then the width. This is particularly important when ordering patterned glass or the pattern may be fitted the wrong way round. If you are measuring an irregular opening, such as an arch for example, it is best to make up a template in hardboard or plywood first. Remember too, that patterned glass must be fitted with the rough side inwards so that dust and dirt do not collect on the outside. Mark the outside of the glass “face” to avoid confusion.
Cutting and shaping
Cutting square or regular shapes out of glass is comparatively easy with a little care and patience. However, cutting odd or unusual shapes requires skill and planning if a good result is to be obtained. It is essential when cutting any glass to rest it on a flat working surface such as a kitchen or dining room table. Place a blanket on the table first to prevent it from being scratched.
To cut glass, you need a glass cutter, a little paraffin to lubricate the wheel, a pair of flat-nosed pliers and a chinagraph pencil or felt-tipped pen to mark cutting lines on the surface. To cut rounded or unusual shapes, you need a template to match. Make this from brown paper or cardboard so that it lies under the glass and the shape can be traced with the cutter. Make the template about 3mm smaller all round than the actual measurements of the cut to allow for the distance between the edge of the template and the cutting wheel.

Before scoring the line, first nick the edge of the glass at each end with the cutter. When scoring, hold the cutter between the index and middle finger and grip it underneath with your thumb, making sure that it is in contact with the surface of the glass at all times to ensure a clean cut. Stand still and push the cutter away from you in one single movement. Try to cut straight through the glass in one go – never attempt to work backwards or the cut may end up other than where you want it.
Once you have scored around the outside of the shape, tap the glass gently along the underside with a small pin hammer or the end of the cutter, then, gripping the piece firmly on each side of the line, snap evenly downwards to break the glass. Any remaining slivers of glass can be “nibbled” away using a pair of broad, flat-nosed pliers, placing the tip of the jaws at right angles to the line you have just cut in the glass.
Even after trimming, it may still be necessary to smooth down any rough edges. Do this by running an oilstone lubricated with water along the top and bottom edges of the glass at an angle of 45 degrees to the face. When these have been smoothed and bevelled, rub down the face of the cut-edge. A final finish can be achieved by rubbing over the edge with a piece of fine pumice stone. The whole process of smoothing the edge takes some time, but is made easier if you work from the corners, watching out for splintering as you proceed.
Drilling holes
It is quite often necessary to cut a disc form a piece of glass, or to make a circular hole when fitting an extractor fan. However, drilling holes in glass, to fit a mirror for instance, requires a different technique and a more careful choice of cutting equipment. Glass has a tendency to shatter when subjected to vibrations, so it is important to use a drill that operates at less than 350 rpm. As very few power drills can be made to spin at this speed, it is advisable to use a hand brace. The drill bits should be tungsten-tipped ad of a spearpoint or spadepoint design.

To avoid the glass from cracking between the edge of the glass and the drilled holes - never drill holes in glass less than 13mm from the edge – or less than 25mm if a heavy piece of glass is involved. Be sure to always wear safety goggles when you are drilling in order to protect your eyes from small glass splinters.
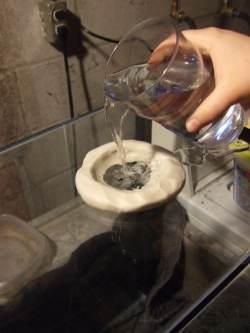
Lay the glass on a flat surface, mark where it needs to be drilled with a felt-tipped pen and make a ring of putty or Plasticine around the outside of the mark. Pour a quantity of lubricant into the ring, such as turpentine or other white spirit for plain glass, or water for mirrored glass. Start drilling from one side of the glass, and just before you break through to the other side, turn the glass over, repeat the process and complete the hole form the opposite side. It is best to drill form the back to the front surface. After drilling, smooth the hole with a piece of abrasive paper, wrapped around a thin piece of flexible pipe. – Antonella Desi
Readers' Comments Have a comment about this article? Email us now.


